This is a sponsored post written by me on behalf of Red Star Yeast. As always, all opinions expressed are entirely my own.
I’ve recently fallen in love with gluten-free baking. Yup, it’s true!
As someone who has baked (with wheat) for what seems like forever, I was pretty skeptical about gluten-free baking at first. But, when I finally decided to cut back on wheat and gluten, I thought it would be a great time to really branch out and finally embrace gluten-free baking.
I waded through a lot of gluten-free recipes at first, trying to find the perfect mix of flours or the perfect technique. Ultimately, I was trying to find something that was a close to what I considered “regular” baking as I could. Sure, there are some recipes for a flour mix that can be substituted cup for cup for all purpose flour. But, when it comes to bread, I found that it just doesn’t work that way. After all, one of the key things that makes bread what it is (especially yeast breads) is the gluten. Instead, I found that the most important thing to do when learning to bake gluten-free bread is to forget everything you know about baking bread with gluten. In fact, if you’re new to baking, you have a bit of a head start!
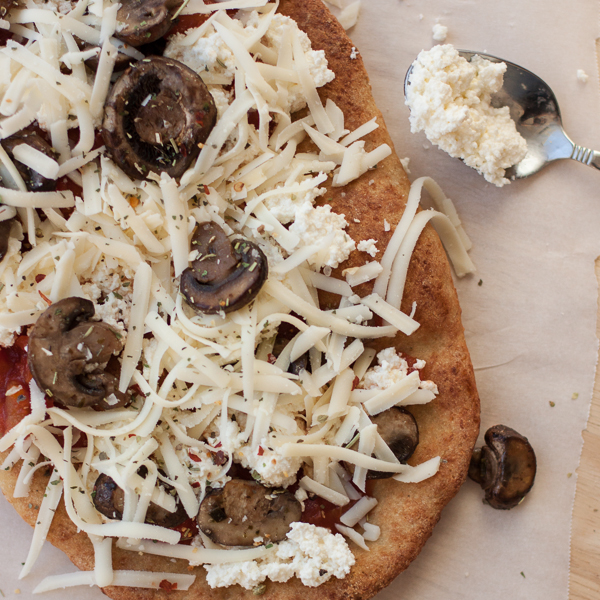
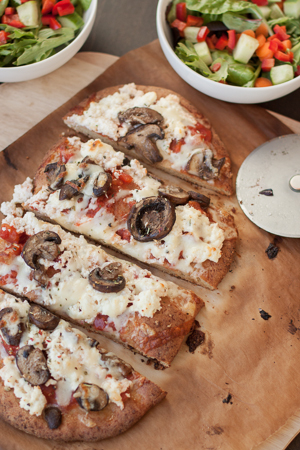
For me, the most important bread to learn to make was a flatbread… I wanted something that I could use for pizza night (which happens every Friday night at my house) that would also be good for dipping in hummus, drizzling with oil and herbs to serve with a salad, or topped with meats or cheese for sandwiches or panini. I consulted a few of my favorite gluten-free blogs and got great advice from a few friends. (If you are looking for some awesome gluten-free recipes, be sure to check out Gluten-Free Girl, Art of Gluten-Free Baking, and Smith Bites. They all have solid recipes). In the end, I found myself going back to this recipe for Breadsticks from Gluten-Free Girl. Though, I never did actually make breadsticks, it wound up being a great starting point for my flatbreads.
I worked with a variety of flours. Some of my flour blends were as simple as a mix of brown rice flour, millet flour (which happens to be one of my favorites, very mild in flavor and texture), and tapioca starch. Other times, I threw in between 6 and 8 different types of flour, trying to find a good balance. I discovered that I really do not care much for quinoa flour, even in small amounts. I found amaranth flour to be a bit too grassy when used in large quantities. And, while bean flours like garbanzo and fava do have a bit of a beany flavor (for lack of a better word), I found that I rather liked the flavor and texture of the flour for a savory flatbread. In the end, for my go-to flatbread recipe, I ended up settling on a mixture of quite a few flours that I found gave a nice balance to both the flavor and texture of the bread. Of course, you could substitute your favorites, assuming you measure your flours by weight and keep approximately the same amount of starch in the mix. I also ended up using psyllium husks (look in the supplements aisle at the grocery store) instead of xanthan gum to help give the dough structure so that it would rise.
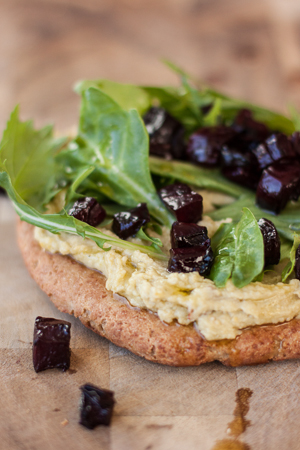
After baking flatbreads and pizzas over 6 times, I came up with a recipe that I am very happy with it. I ended up using an additional egg and a bit less water. I found that the extra egg gave the flatbreads a nice texture and some extra rise. I’ve made it for my family and also for friends. While it is not exactly like our regular pizza dough, it really is quite good. In fact, both my husband and other friends have commented on the fact that they didn’t even realize it was gluten-free. It’s been a hit on pizza night and will continue to be in the regular rotation at my house. They are also fabulous topped with hummus, roasted beets, and greens (with a healthy drizzle of olive oil), if you’re not in the mood for pizza.
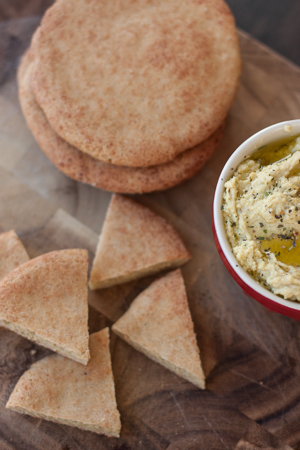
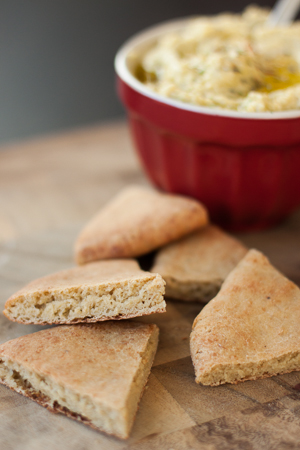
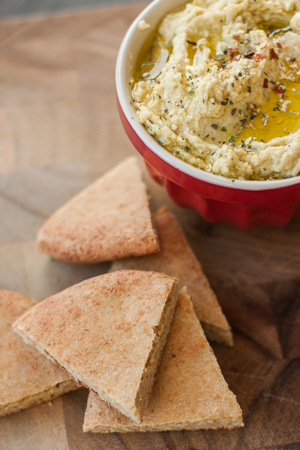
The flatbreads are definitely best enjoyed the day that you bake them… But, that doesn’t mean you have to eat them all at one time. If you do have leftovers, I’d recommend cutting the leftover flatbreads into wedges, brushing them with olive oil, and then sprinkling them with your favorite seasonings. Toast up the wedges in the oven for a few minutes and use them to dip away!
I’m thrilled to have the opportunity to share this recipe with you and also to feature it on the Red Star Yeast website. I think you’ll find that whether you are a seasoned baker or you are new to baking entirely, you can bake these flatbreads with great results. I’ve included step-by-step photos to show you what the dough (or, perhaps more accurately, batter) should look like at each stage. Plus, if you want some more tips, or you are looking for some suggestions for substitutions, I’d recommend checking out the Gluten-Free Baking Tips on the Red Star Yeast website. It’s a great starting point!
As always, if you have questions, I’m more than happy to answer them here. You can always connect with me on Twitter (@JenSchall) . Red Star Yeast is also on Twitter (@RedStarYeast), and they are always happy to answer questions, as well! And, of course, we’d both love to hear about your gluten-free baking adventures!
Savory Gluten-Free Flatbreads
Makes 8 flatbreads or 4 small pizzas
(Loosely adapted from Gluten-Free Girl)
- 200g Millet Flour
- 200g Tapioca Starch
(I also had good success using potato starch, if you prefer that) - 150g Garbanzo and Fava Bean Flour
- 100g Brown Rice Flour
- 100g Amaranth Flour
- 3 tablespoons psyllium husks
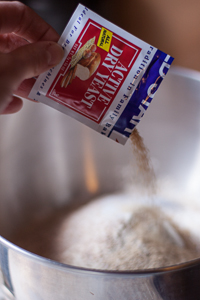
- 2 1/4 teaspoons (1 packet) Red Star active dry yeast
- 2 teaspoons fine sea salt
(You can also use a seasoned salt or add a bit of garlic powder, as well) - 2 eggs
- 1/4 cup extra virgin olive oil
- Approximately 2 cups cool water
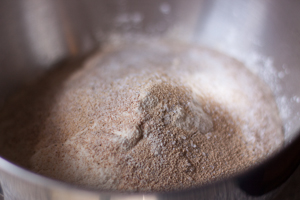
Begin by combining the millet flour, tapioca starch, garbanzo and fava flour, brown rice flour, and amaranth flour in the bowl of a stand mixer. Add the psyllium husks, yeast, and salt. Using the paddle/beater attachment on the mixer, mix slowly for a minute or two, until the flours are well combined.
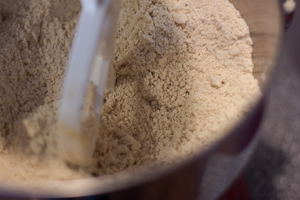
Add the eggs, and continue to beat the mixture until the eggs are incorporated into the flours. Add the olive oil and mix again until evenly incorporated. The mixture will be a bit crumbly, and it will resemble wet sand.
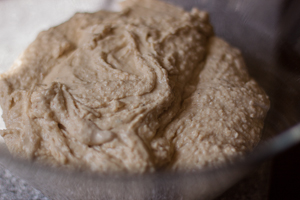
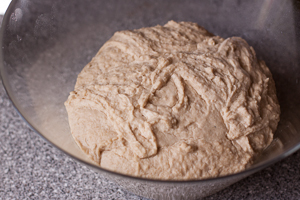
While mixing on a slow speed, gradually add the water, starting with about 1 ½ cups. You want the dough/batter to be somewhere between a thick pancake batter and a cookie dough. It will not form a smooth ball as it would when working with gluten flours. If the mixture is sticky and sticks to the beater when the mixer is stopped (think cookie dough), continue to add a bit more water. You want the batter to gently fall from the beater when the mixer is stopped.
(If you are used to baking with wheat flours, it will seem too wet. Forget what you know and take my word for it.)
Transfer the batter/dough to a lightly greased bowl, cover with plastic wrap, and refrigerate overnight.
The dough will thicken overnight and rise slightly. Leave the bowl covered, and set it out on the counter so that it can come to room temperature for about an hour or so. It will continue to rise a bit as it warms up, but it will not rise as much as a traditional bread dough will.
When you are ready to shape the dough, line baking sheets with parchment paper (or a silicone mat). If you have a baking stone in your oven, I recommend just baking on parchment paper directly on the stone.
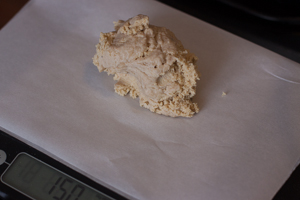
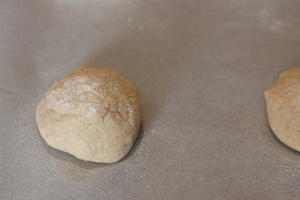
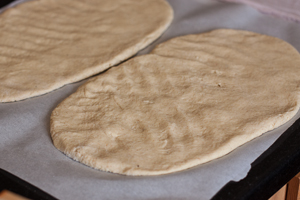
Measure out about 150g of dough for each flatbread and gently shape it into a ball. For more of an oval pizza, measure out about 300 – 350g of dough. Sprinkle each ball with some gluten-free flour (I used rice flour at this point) and gently use your hands to flatten and shape the flatbreads or pizzas on the parchment paper. The dough might be a bit sticky, but should be easy to work with, especially if you dust your hands with flour. Cover the shaped flatbreads with a damp towel, and let them rise for about 45 – 60 minutes.
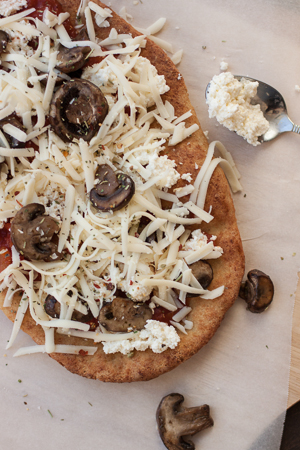
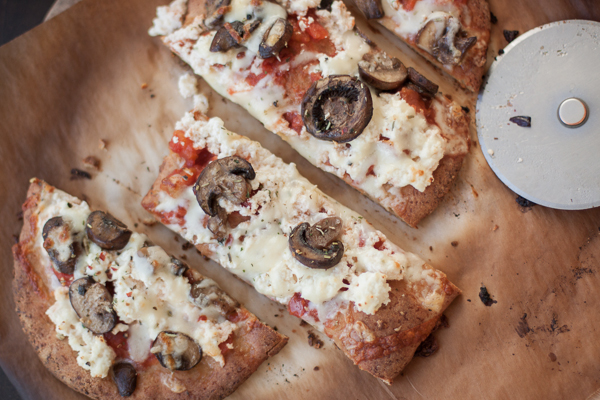
Meanwhile, preheat the oven. For softer flatbreads, preheat to 450F. Bake the flatbreads for 10 – 12 minutes, until golden on top. For pizza, preheat to 500F. Pre-bake the pizza for about 10 minutes. Then, add toppings, and bake for an additional 6-8 minutes, until the toppings are warm and the cheese is bubbly and golden.
My Kitchen Addiction Disclosure – This post was sponsored by Red Star Yeast. Though I have been compensated to write this post, all opinions expressed are my own.








Thanks for doing all the fine tuning of this recipe Jen. I’m going to need to add a few more speciality flours in order to make this recipe but I’m anxious to try it. Thanks for sharing. It looks really good!
Hi
I can’t have rice and or
Quinoa flour what else can I substitute for the rice flour in the flat bread?
I have a limited diet due to eosinophilic gi.
Hi! You could really substitute any flour that you are able to have, just use the same amount by weight. You could use more of the garbanzo flour or any other flour that works for you. I’d recommend just playing around with a few to see what you like best!