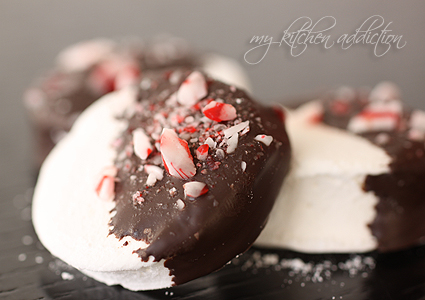
 Still looking for a last minute homemade gift idea? I’ve got you covered!
Ever since I tried making these chocolate marshmallow bunnies from A Farmgirl’s Dabbles for Easter, I’ve wanted to make them again. If you’re tried making homemade marshmallows before, you know what I’m talking about. And, if you haven’t made homemade marshmallows, take my word for it and give them a try. They are nothing (I repeat nothing!) like the chalky and spongy things you find at the grocery store. They are perfectly fluffy and light… And, they are pretty addictive.
I have always been a peppermint fan, and I especially love peppermint treats for Christmas. If you pair the peppermint with some chocolate, I am a happy girl. I’d been thinking about making some homemade cocoa mix, and I knew I’d need some marshmallows to go with it. So, naturally, I decided to make some peppermint marshmallows. Of course, I haven’t yet gotten around to making the cocoa mix. But, the marshmallows are fabulous on their own. Dipped in dark chocolate, they are a lot like a fluffy version of a peppermint patty.
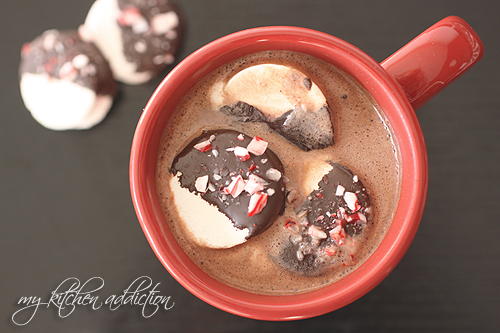
You can easily make a big batch of these marshmallows in one afternoon… And, most of that time is just letting the marshmallows cool and set up in a pan on the counter (i.e. you can also be wrapping presents, cleaning the house, etc.). I’d just recommend that you package them up as soon as possible after making them. Otherwise, you’ll run the risk of snacking on them and not having any left for gifts! Not that I would have any experience with that…
Peppermint Marshmallows
Makes 4 dozen marshmallows, depending on the size
(Adapted from A Farmgirl’s Dabbles)
- 2/3 cup of water, divided
- 3 – 1/4 ounce packets of unflavored gelatin
- 1 cup granulated sugar
- 1 cup light corn syrup
- 1/8 teaspoon Kosher salt
- 1 teaspoon pure vanilla extract
- 1 teaspoon peppermint extract
- Powdered sugar (for dusting)
- 6 ounces dark chocolate, cut into chunks
- 1/2 teaspoon vegetable shortening
- 2 candy canes, crushed into small pieces
Pour 1/3 cup of water into the bowl of your stand mixer. Sprinkle the gelatin over the water, and let it sit (in the mixer, ready to go) to soak up the water while you prepare the sugar syrup.
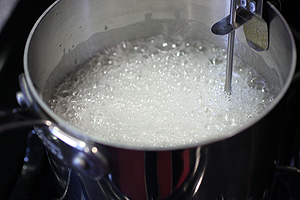
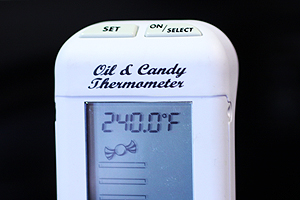
To prepare the syrup, combine the remaining 1/3 cup of water, sugar, corn syrup, and Kosher salt in a heavy saucepan over medium heat, fitted with a candy thermometer. Stir once or twice, until the sugar is dissolved. Then, continue cooking without stirring, until the mixture reaches 240°F (soft ball stage).
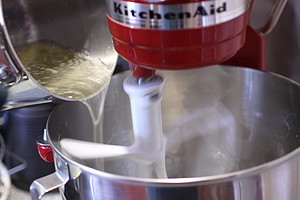
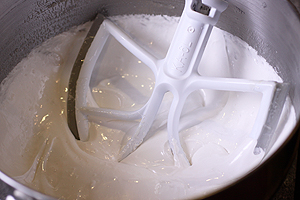
Fit the mixer with the beater blade, and gradually add the hot sugar syrup to the reconstituted gelatin, while beating on the slowest speed. Add in the vanilla and peppermint extracts. Gradually increase the mixer speed to medium-high. The mixture will thicken and turn white. Continue to beat until the marshmallow is thick and fluffy, and starts to pull away from the sides of the bowl in strings. This will take about 7 – 10 minutes.
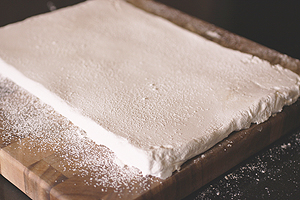
While the marshmallow is beating in the mixer, grease a 9 by 13-inch cake pan and dust it (generously) with powdered sugar. Transfer the marshmallow mixture from the mixing bowl to the cake pan (spraying your utensils with cooking spray or greasing them with a bit of shortening helps to keep the stickiness to a minimum). Wet your hands, and press the mixture into an even layer in the pan. Let the marshmallow mixture cool and set up in the pan for about 2 hours.
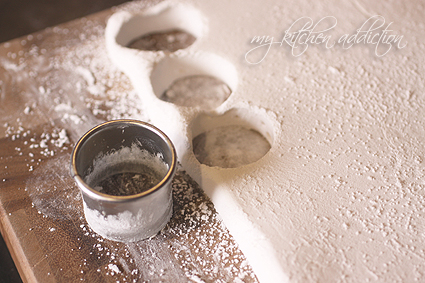
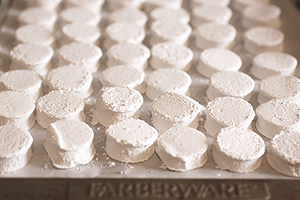
Flip the marshmallow out of the pan onto a surface dusted generously with powdered sugar. Use a greased cookie cutter (I used a small 1 1/2″ circle) to cut out individual marshmallows and transfer them to a baking sheet lined with waxed or parchment paper. (You can also cut the large sheet of marshmallow into squares, but I prefer the even shapes I get using a cookie cutter.) Dust the marshmallows with some additional powdered sugar to keep them from sticking to each other.
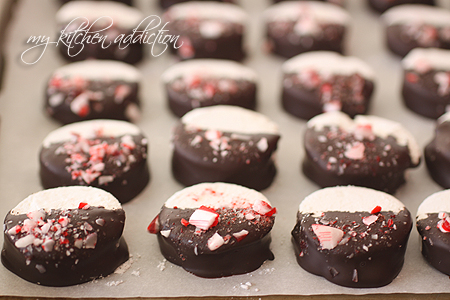
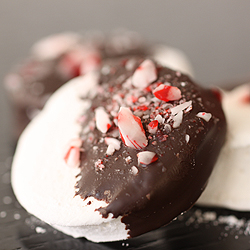
Combine the dark chocolate and vegetable shortening in a microwave safe bowl. Melt the chocolate, microwaving for about 15 – 30 seconds at a time, until the chocolate is smooth when stirred. Dip the marshmallows in the chocolate and sprinkle with the candy cane pieces. Return the marshmallows to the waxed paper lined baking sheet until the chocolate has cooled and set. Store in an airtight container or wrap in cellophane bags for gift giving. The marshmallows will keep for up to 2 weeks.


That is my kind of marshmallow!
Yummy!!!
Wow, a marshmallow I can get behind!
SO pretty! I really want to try this…
These are so cute! Side note: I need that thermometer! Where did you get it??
Amber – The thermometer was from Williams Sonoma… I bought mine a few years ago, but this one looks about the same.
I am SO making these… I wanted to make some more treats before Xmas, but I am cookied out! I want to use a Christmas tree cookie cutter, but I’ve never made marshmallows before, do you think there’s too many corners for it to come out pretty?
Michelle – I think the Christmas tree cutter would work, just be sure to grease it well and keep dipping it in powdered sugar as you cut out the marshmallows. Enjoy!
Wow! Now that’s what I’m talking about. What a great little treat!
These are beautiful, Jen!!! My candy thermometer just broke so I need to get a new so I can make some of these. And more toffee!
Just a note- your recipe says to cook until the syrup is 140 degrees F. I think you mean 240?
You’re right, Natalie… Thank you! Fixed!
Awesome! I’m making a batch right now… can’t wait to try them! Thanks for the recipe :]
O.K.! Something else to make for the grandkids. That hot chocolate looks delicious with your wonderful marshmallows floating in it. Dipping them in chocolate…perfect idea!
Okay, now I REALLY need to try making marshmallows! Yours look gorgeous, especially dipped in chocolate…yum! Have a very merry Christmas, Jen!! :-)
Hi Jen,
I just came across your website and wanted to let you know that it is great! Your photos are beautiful too.
As a side note this post especially hits home today of all days because I just finished my first batch of homemade cinnamon marshmallows a few hours ago! You’re completely right, fresh marshmallows are nothing like what most people grow up with as kids and everyone should have the pleasure of tasting these homemade goodies at some point. :)
Just wanted to say Hi and thank you!
Merry Christmas,
~Rebecca
Ok…I would love to have the cinnamon marshmallow recipe…and I LOVE cherry, wonder if there’s a way to incorporate different flavors?
Anyway, just found this awesome blog-great, professional looking pics!
Have you guys ever made them by just dropping them, looking like clouds?
I can’t believe it has taken me this long to find you, but I may just love you now. Beautiful blog!
Omg, peppermint and marshmallows are just about my two most favourite things ever. This is just magical.
I made homemade Vanilla Bean Marshmallows the other day and got a little crazy patting them into the pan. Flat marshmallow are not so pretty. So, I dipped them in chocolate and sprinkled with crushed candy canes. We must be on the same wavelength.
A very Merry Christmas to you and your family!
Oh my, Jen! These look fabulous! Now I’m hungry to make another batch – too much fun!! Thanks for the link. Merry, Merry Christmas!!
This is the 2nd post I have read in a couple of days about peppermint marshmallows and I think it’s a sign. I made marshmallows before but it was a bit messy. Everyone else seems to do a much cleaner job so this is my mission in 2012.
and, of course, that comment was not from Miss Cleo, it’s from her silly mum!
Hehe… I was wondering how Cleo made marshmallows without getting sticky stuff all over her paws. :)
I love this recipe!
Hello,
So I tried making this and came to an issue trying to get the mixture from the mixer to the pan. When I put it in the pan, I could not get it to spread very well. Its chunky and it’s not an even spread. Any suggestions? Should I grease the mixer bowl? or maybe not leave it mixing so long? Any help or tips that can be passed around would be very helpful!!!!!!
Thanks,
David
Hi, David – It is a little bit difficult to spread normally, but I don’t think the consistency should be “chunky” as you described. I would make sure that the gelatin is well constituted in before adding it to the mixture, and I would also be sure you’re not overmixing. I am usually able to spread it with a greased spatula and then press down evenly in the pan with clean/greased hands. Hope that helps!