This is a Sponsored post written by me on behalf of Carapelli for SocialSpark. All opinions are 100% mine.
 A few years ago, I was traveling with my husband in Boston. He was on a business trip and was working during the days, and I was working from the hotel in the mornings and then exploring the city in the afternoons. To keep myself entertained, I signed up for a market tour in the Italian North End of the city. On the tour, I had the opportunity to nibble on pastries, sniff spices, sample luscious meats and cheeses, and taste olive oils.
Before that tour, the concept of tasting olive oil was completely foreign to me. I was familiar with wine tastings, but hadn’t realized that a similar concept could be applied to olive oils. But, after that first tasting, I was hooked. I really started to pay attention to the types of oils I used in my kitchen and the nuances with each one.
Fast forward to a few weeks ago. I got an email asking if I would be interested in tasting some Carapelli extra virgin olive oil. As I am not one to turn down a chance to try a new olive oil, I agreed. I thought it would be fun to compare it to my current olive oils (yes, I always have more than one in the house… more on that later!). They sent me a bottle of their premium 100% Italian extra virgin olive oil to try, along with some tasting notes (which were a good refresher since it’s been a few years since my market tour tasting!).
Tasting Olive Oil
When you’re tasting olive oil, you have to consider four S’s – Swirl, Sniff, Slurp, and Swallow. Here’s the rundown of the oil I tasted…
- Swirl – Start by pouring a small amount of oil into a small glass. Give it a swirl to release the esters in the oil. This will release the aroma.
- Sniff – Take a good sniff of the oil. With the 100% Italian olive oil, I could smell the rich olives, and the oil had a slightly peppery aroma (as compared to some that I have tasted that are more fruity or grassy).
- Slurp – Here’s where you taste the oil by taking a good slurp of it and sipping a bit of the air (which helps to emulsify the oil a bit so you get a good taste!). When I tasted the 100% Italian olive oil, I took note of the smooth texture and rich flavor of the olive oil. It had a slightly peppery taste, but certainly not overwhelming.
- Swallow – Once you swallow the olive oil, there should be no aftertaste. But, you may notice a bit of a sensation in your throat. With the 100% Italian olive oil, I noticed a bit of a peppery sensation.
And of course, once I’m done with the official tasting, I also like to sample the olive oil on a piece of crusty bread. That part is entirely optional, though! If you want to give the tastings a try for yourself, you can get a $1.00 OFF coupon at www.CarapelliUSA.com to get you started!

Olive Oil in the Kitchen
As I mentioned before, I tend to keep a few different olive oils in my kitchen at all times. I use olive oil for just about everything (if you have read many of my recipes, you’ve probably noticed that!), but I don’t use the same olive oil all of the time.
Since my first olive oil tasting experience in Boston, I’ve been a bit more selective about what olive oils I use when. That may sound expensive to you, but I think it has actually saved me some money. You see, a lot of people buy a medium-priced, fruity olive oil and use it for everything. Fruity olive oil is great for dressings and finishing, but you really don’t need it if you’re just using it to sear a piece of chicken in a pan. You can use a milder, lighter (read: cheaper) olive oil for that. So, while you may need to stock up on a few new bottles, using the right oil for the job can save you some money and add great flavor to your dishes. Here are the types of olive oils I like to have in my kitchen…
- Light and Mild – I always keep a big bottle of light, mild olive oil (one without a real distinct aroma or taste) around for my general cooking. Here’s where I opt to save some money and go for a slightly cheaper and versatile oil. I use it for everything from sauteeing vegetables to searing meat to rubbing on a chicken before I roast it.
- Fruity – When I am making salad dressings or finishing a dish with some olive oil, one of my favorites is a nice fruity oil. I find that fruity oil is especially good for raw veggies and pairs great with citrus for my summer salads. You could also substitute a more grassy flavored olive oil here, but I don’t particularly care for them as much as the fruity oils. It’s all about your preference.
- Rich and Peppery – I also like to use oils that are a bit richer and peppery in taste. I will occasionally use them in dressings when I want a stronger flavor to stand up to bold flavors in a salad (a salad with roasted vegetables, for example). I also like to use rich and peppery oils when I am baking with olive oil (and want the oil to stand out in the completed baked goods). The key to choosing the right peppery oil for you is to taste a few of them and figure out which one you like. You will taste the flavor in your food, so you want one that you really enjoy!
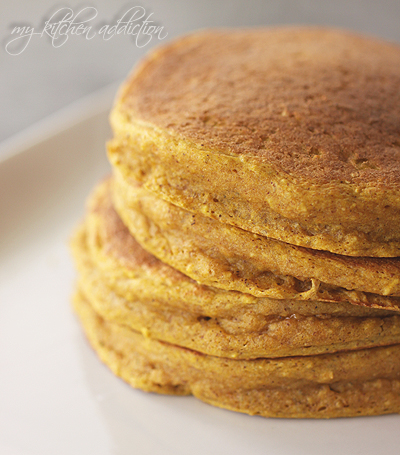
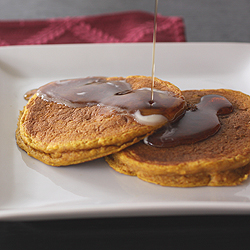
Now that we’ve tackled tasting olive oils and discussed the different olive oils that I like to keep on hand, let’s get into the kitchen and actually use them! I tend to opt for the slightly peppery oils a bit more this time of year. So, I decided to whip up some pumpkin pancakes with some of the 100% Italian olive oil I received. I like the way the peppery olive oil works with the mild pumpkin and warm fall spices.
I started with my homemade multigrain pancake mix for these pancakes. Not only do I love the flavor of the mix, but it’s packed with great fiber and protein for healthy (and tasty!) pancakes. I highly recommend making a big batch so you always have it on hand!
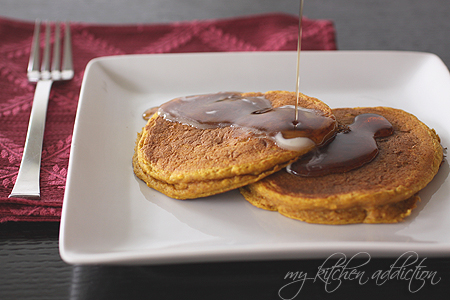
Pumpkin Olive Oil Pancakes
(Makes 10 – 12 pancakes)
- 2 cups multigrain pancake mix
- 1 teaspoon ground cinnamon
- 1/2 teaspoon ground ginger
- 1/4 teaspoon ground nutmeg
- 1 1/2 cups milk
- 1 cup pumpkin puree
- 1 egg
- 1 tablespoon of extra virgin olive oil(plus additional for drizzling)
- 1 teaspoon vanilla extract
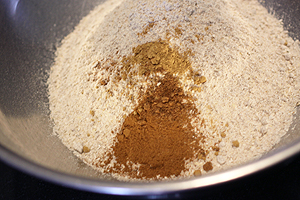
Combine the pancake mix, cinnamon, ginger, and nutmeg in a large mixing bowl. Whisk to evenly combine.
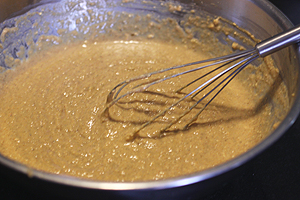
In a separate bowl, whisk together the milk, pumpkin puree, egg, olive oil, and vanilla extract. Pour the wet ingredients into the flour mixture, and whisk until the ingredients are just combined. Let the batter rest (this helps soften the whole grains a bit) while you preheat your skillet.
Preheat your griddle or a large skillet to medium-low heat and drizzle with a little bit of the olive oil. Once the skillet is hot, pour about 1/4 – 1/3 cup of batter into the pan for each pancake. Cook the pancakes for a few minutes on each side, flipping them when bubble start to appear on the surface of the batter.


I really enjoyed reading this post Jen, and your pumpkin pancakes look great :)
There are so many great pumpkin recipes in the blog world right now, and your pancakes are no exception. They look fantastic!
I’ve always enjoyed using olive oil instead of butter in my cakes and cookies but I’ve yet to try it in pancakes!
Lovely post – I attended an olive oil tasting last year and who knew there were so many variables? Love these pancakes!
Fabulous pancakes! I’ve never been to an olive oil tasting before, but it sounds like fun!